Tips – .htaccess を有効にする – Ubuntu LAMP

前回の、UbuntuへWordpressをインストールした際の補足記事になります。(未読の方は、下記よりどうぞ)
WordPressに限らず、少し高度なサイト構築をしていくと、 .htaccessを使用する機会がでてきます。Ubuntuでの設定方法を、サクッと書いておきます。apache2.confをいじるか、000-default.confへ追記するかしましょう。後者がおすすめです。
apache2.confでやりたい方は、
$ sudo gedit /etc/apache2/apache2.confなどとして、
<Directory /var/www/>の欄の、
AllowOverride Noneをコメントアウトするなどして
AllowOverride Allなどと追記して許可しておきましょう。
000-default.confでやる場合は、
$ sudo gedit /etc/apache2/sites-available/000-default.confなどとして 000-default.conf の30行目付近へ下記を追記します。
	<Directory /var/www/html/>
		Options Indexes FollowSymLinks
		AllowOverride All
		Require all granted
	</Directory>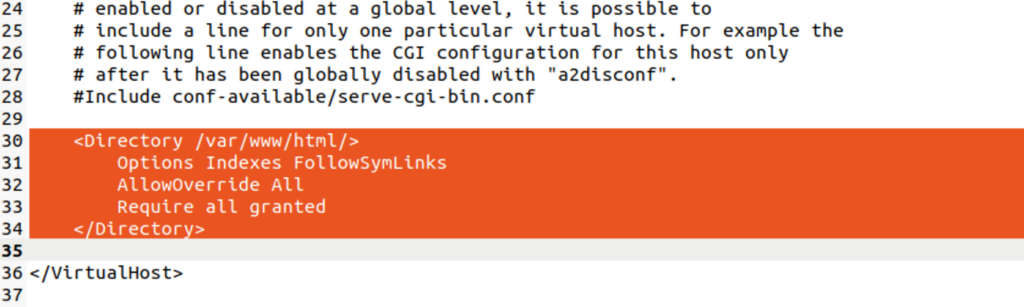
以上です。
いずれの場合も、Apacheを再起動して反映します。
$ sudo service apache2 restart完了です〜。